
Looking Deep Inside The Code
Creating the Directory
First, I would like to thank you for reading my first post here at FrostByte Security. Today I want to show a technique used in debugging which can help us look deep into the computers execution processes. This is a more difficult topic, so I would recommend you have a basic understanding of Linux, some C code(very basic understanding), and some Assembly language (basic understanding).
I’m going to boot up my virtual machine, here I am using Ubuntu, but feel free to use Kali or whatever distribution you feel comfortable on. We want to work in a fresh directory so create a new directory,
mkdir test/practice.
Here I’ve actually created two directories, one inside the other, because I already had some files in the test directory. When your done change to the directory you created using the
cd <your directory>.
Here’s it what it should look like.
Creating the Code
Next, we’re going to create a C file with some C code in it. Use the vi or nano command whatever you’re more familiar with. I’m going to create a C file called secretcode.c using the sudo vi secretcode.c command. Inside we’re going to put this code so feel free to just copy and paste it into your terminal.
#include <stdio.h>
#include <string.h>
int main() {
char *password = "SecretPassword\n";
char input[151];
puts("Please enter the password:");
fgets(input, 149, stdin);
if (strcmp(input, password) == 0) {
puts("Success!");
} else {
puts("Fail!");
}
return(0);
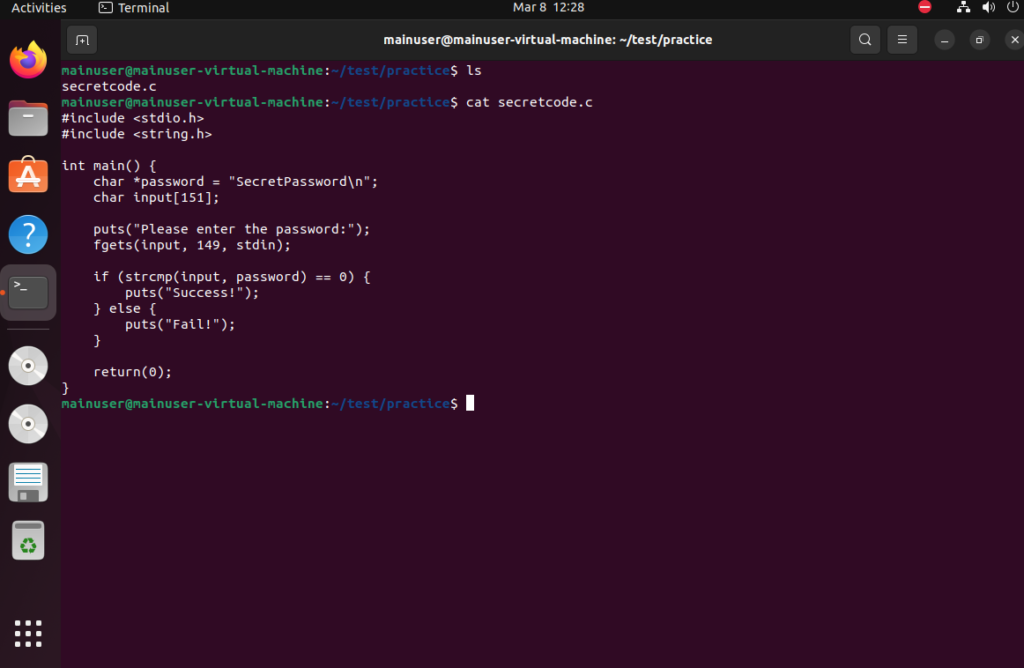
}Now if you use the ls command you should see secretcode.c in the directory. You can also use the cat command to see what’s in the file.
Let’s Compile It
Now that we have the code, we want to compile it and make sure it runs before debugging it. Let’s compile it using
gcc -g -m32 -o secretcode secretcode.c (I’m not going to breakdown the details of this command here, but it is compiling the C code for us)
Now we’re going to run it and make sure it works. Let’s run the code using ./secretcode and the code should run type in any password like “somepassword” and you should get this.

GDB
GDB stands for GNU Debugger and it should be pre-installed on all Linux systems already. You can install pwndbg which is what I use in the example with the following commands.
sudo apt install git
git clone https://github.com/pwndbg/pwndbg
cd pwndbg
./setup.sh
Next let’s run gdb ./secretcode

Let’s look at the functions of the code using info func which will allow us to look at the functions of the binary. Notice the main function, strcmp, fgets, fputs @plt, these are not binaries and are loaded dynamically when the program starts. Now comes the next command.
Follow up with disassemble main and let’s break it down some more. You terminal should now look like this.
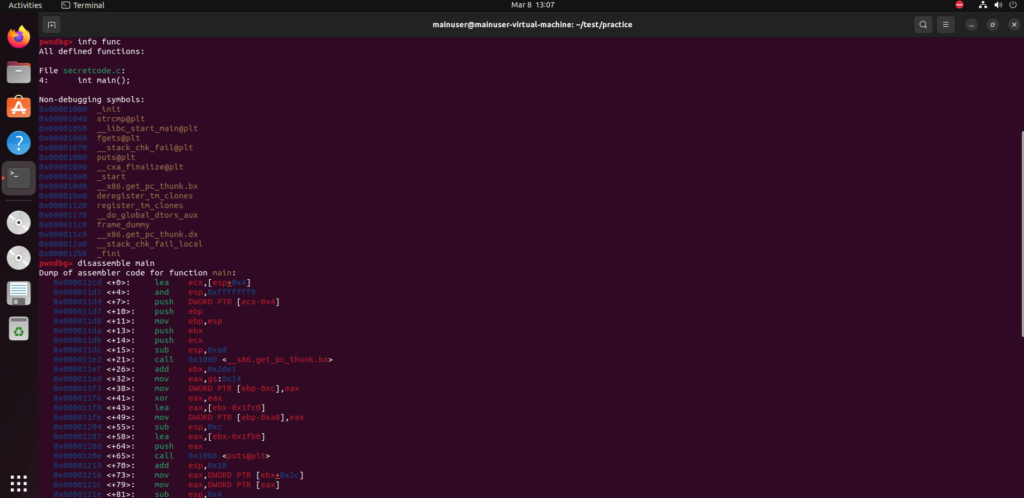

First, let’s look at the call 0x1080 <puts@plt> in C the puts command is printing out a string. (your address might be different that’s ok)
We also have the call 0x1060 <fgets@plt> the fgets command is going to take user input, so this is where we are inputting the password.
Now lets note the call 0x1040 <strcmp@plt> which takes two strings and see if they match each other.. this looks interesting let’s dive into this function more and see what we can find out.
List lines 1 -18 of the code with l 1,18 this will bring up the code. Next, find the strcmp line and put a breakpoint at this line.
We will break at line 11 using break 11 and then we will run the program using r from here input a password it could be anything. Now let’s look at where we are at.
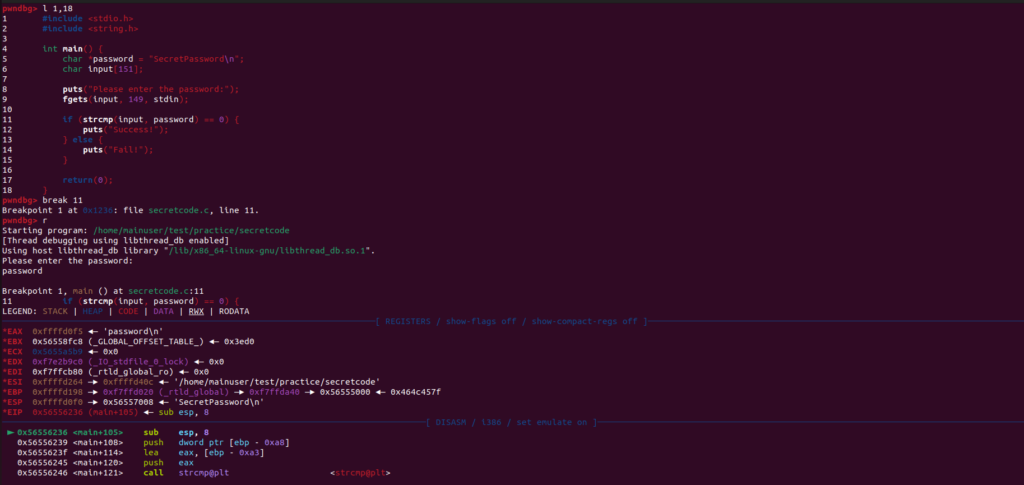
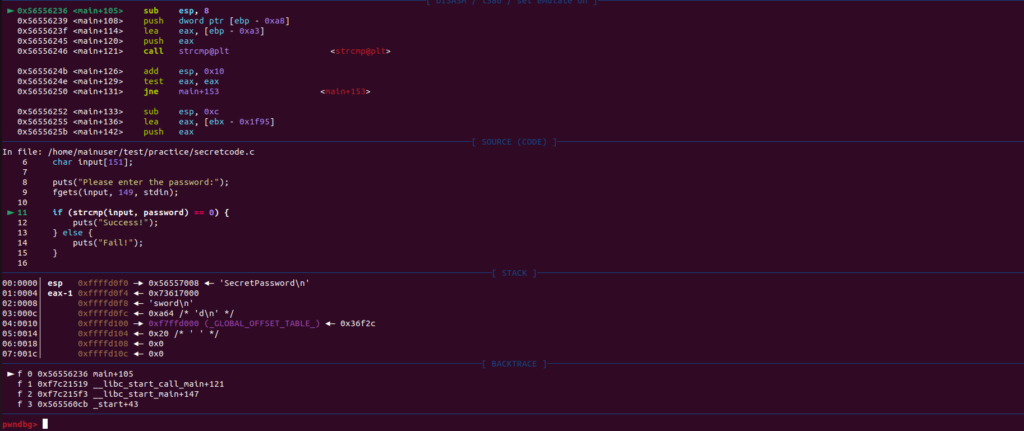
First, we have the registers EAX, EBX, ECX, etc. I am not going to delve into this here, but just know this is where information is being stored.
Next, is the disassemble section which breaks down the strcmp function in Assembly code and shows where in memory things are getting called and pushed too.
Third, is the source code, self-explanatory.
Last, is the stack and backtrace. You can see where the stack pointer is pointed too by the ‘esp’ and backtrace is just a summary of how you got to where you are in the code.
Looking Deeper
Let’s enumerate the registers by using the info reg command.

Let’s grab 15 instructions from the $EIP register which is responsible for the call function.
x/15i $eipNow here is where it’s going to get a lot harder and more confusing, but stick with it.
Let’s look at our instructions. Remember we are trying to get to the string compare function. So let’s set another break point at the memory address of our strcmp function.

break *<memory address> be sure to include the asterisk, this denotes its a memory address. We are looking at the address directly to the left of the strcmp function. Now you should see “breakpoint 2 at <memory address>”.Type c to continue running the program.

Next, we’re going to use the si command so we can step into the function. And again you will see something similar to the previous breakpoint, but we’re going to stop here and take a closer look.
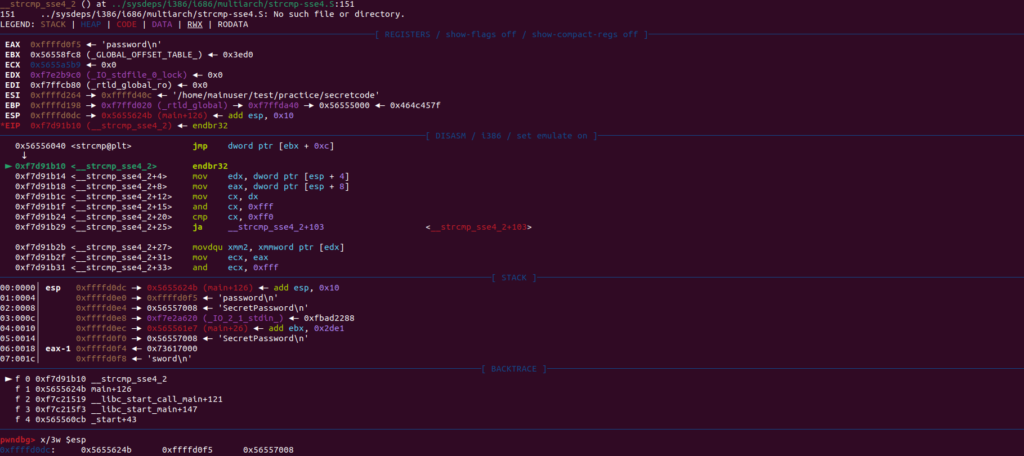
Now we are going to grab the strings that are stored in the memory. These are going to be on the stack as we are in the function that is comparing the two strings, the one we input and the one it’s being compared to in the code. For now just know the strings are located at +4 and +8 on the stack (we’re not going to go into that on this tutorial).
Let’s use the x/3w $esp this is going to take the 3 words on top of the stack and print them out in hex.

Here we have 3 different hex words. Let’s print them out using the x/s <memory address> which is simply going to print the contents of each address. You can see here the second address is the password I input and the third address is the secret password!
Now, lets exit gdb using exit and test out the password by running the program again.

*The information provided on this website is for educational purposes only and is not intended to be a substitute for professional cybersecurity advice. The tutorials, articles, and other materials published on this website are intended to provide general information on cybersecurity concepts, practices, and technologies. The author of this website is not responsible for any errors or omissions in the content provided and shall not be liable for any damages arising from the use of the information on this website. The reader should always seek professional cybersecurity advice before making any decisions related to cybersecurity matters.*