
By: Frank Galambos
Starting off right
Being able to triage malware through static analysis is a critical skill in todays evolving cyber landscape. Even though malware may be from a known family, malware authors love to change their tactics every campaign either through packing, injections, loaders, and more. Here’s a basic overview for analysts trying to get started on their own. This is article is intended for absolute beginners and later will get into the advanced stages of analysis.
What is static analysis?
In a nutshell, it’s analyzing malware without detonating it. We examine the program without having the code run at all on the work station Why is it important? As mentioned, quality static analysis will help us gain some basic understanding of the program before we step into dynamic analysis (running the code). Understating what imports are used and particular strings will formulate our own hypothesis that we can then test in the dynamic stage. Static analysis prepares our minds before we step into dynamic testing for the first time. Dynamic and static analysis have a certain rhythm you have to catch, some what like a dance. You’ll often move from back and forth once you gain a better understanding of the malware.
Safe Handling and Practices
Malware safe handling is the most important skill when triaging any malware. Malware is only as dangerous as you make it to be when handling it and careless actions will result in you infecting your machine and everyone connected on the network(and possibly beyond). The methodology I use when handling malware is similar to my methodology when I was in the military handling fire arms. Even if the malware is “de-fanged” or “contained” its always smart to treat it as if it’s live. I’ve compiled 7 safe handling practices that I personally use that have helped me greatly.
- With malware file extensions, it’s always good to add another extension or string after the “.exe” and change the file name and format. This will ensure that incase you click the file, it won’t actually detonate. Ex: changing thisfile.exe to thisfile.exe.djks . I’ve seen some that keep the same naming convention such as “malz” or “mal” too.
- Always double check that you’re disconnected from the internet and other devices. Unless your VM is intentionally connected to another resource for analysis (i.e inetsim) then you should disconnect before any examination. Double check your network connections by going to your network settings and invoke a ping command to some common websites (I usually do a ping command to a couple websites like google. I advise a DNS ping and a IP ping, just incase the DNS server is down). Ex: ping www.google.com and ping 8.8.8.8.
- Ensure the sample you’re triaging is in plain site and not to the side adjacent to your other pragmas. It makes things easier and cleaner for you. Especially when you get into dynamic.
- This should be already set when you installed your VM, but your “share clipboard” and “drag and drop” options should be disabled. Find this under the devices tab on your GUI or under Settings>Devices from the hypervisor’s homepage. *note: All these configurations are based off of VirtualBox*
- Check your network adapter settings on your hypervisor. Network>Adapter>Attached to and it should be some type of “Host only” adapter.
- Ensure after all your tools and configurations are made, you take a clean snapshot of your set up. Obviously, this is to revert back after detonation is complete.
- Whenever you send a sample, it’s recommended to compile it in a zip file with the password and hashes (MD5 and SHA1). Generally speaking, file passwords for all malware are “infected”. This is password setting is another safeguard incase you do click the file on accident, you have to knowingly input a password to open it and detonate it.
Analyzing: Tools
Everyone has different methodologies in analyzing and I personally don’t use the same exact tools every time or steps. For static analysis my mindset is the same though which is; how much information can I get without actually “touching” this malware? For anyone from a penetration testing or threat intelligence background, they’ll understand that researching and information gathering is half the battle. That being said, don’t get caught up in the weeds of things. Quality static analysis will yield good results, but as analysts we must also be conscious of our time limits and work accordingly. Just remember to stay focus!
Strings
Analyzing strings can be often overlooked I feel. Many times they can have little to no salvageable information. Especially true if the malware is packed. It’s always good though to breeze through some strings with the Strings tool or Floss. I recommend outputting them to a text file and setting the file on your lab desktop. It’s a lot easier to sort through. Sometimes you can find URLs, encryption algorithms used, file names, deleted/generated keys, function calls, etc… A wide range of data is available in strings. Just remember not to get stuck analyzing every line. This is very much like finding a needle in the hay stack. If you miss something or don’t get anything at all, not a big deal. This process is purely supplemental to aide in your dynamic analysis. To execute a floss command type Floss “file name”. If you’d like to print this out file to your desktop just type out Floss “file name” > “what you want to name file” . Of course, just ensure you’re in the correct directory before you invoke these commands.
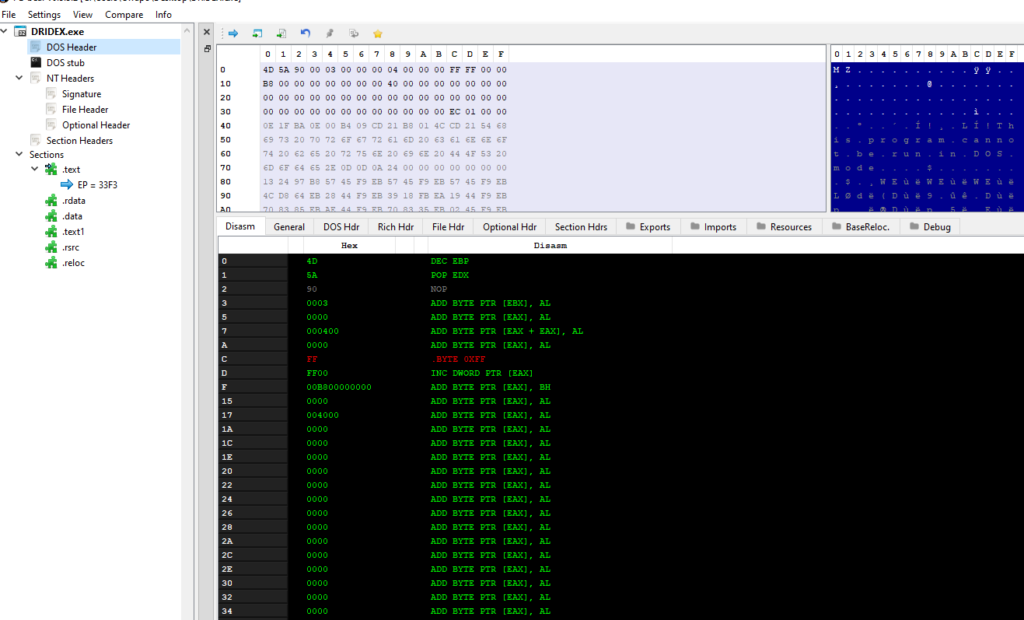
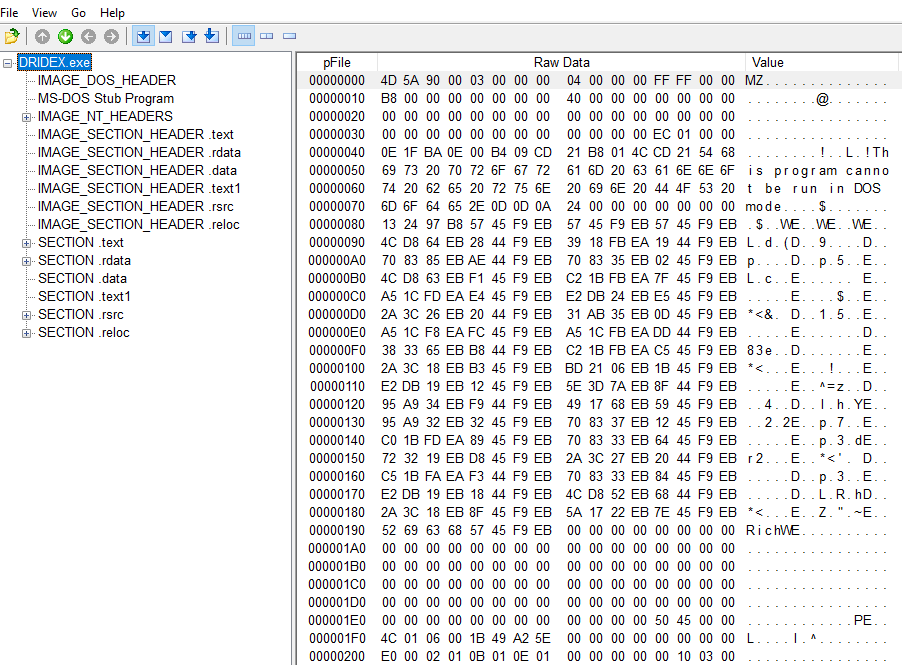
The Magic Bytes
“MZ” or 4D5A in Hex, are known to analysts as the magic bytes because whenever these appear on the DOS header, they’re usually malicious. These bytes are usually accompanied by the phrase “This program cannot be ran in DOS”. Referring to the old Microsoft OS interface that was used to interact with the system. These are probably the most assuring bytes you can spot when analyzing malware. It usually means your on the right track.
PE Analysis Tools
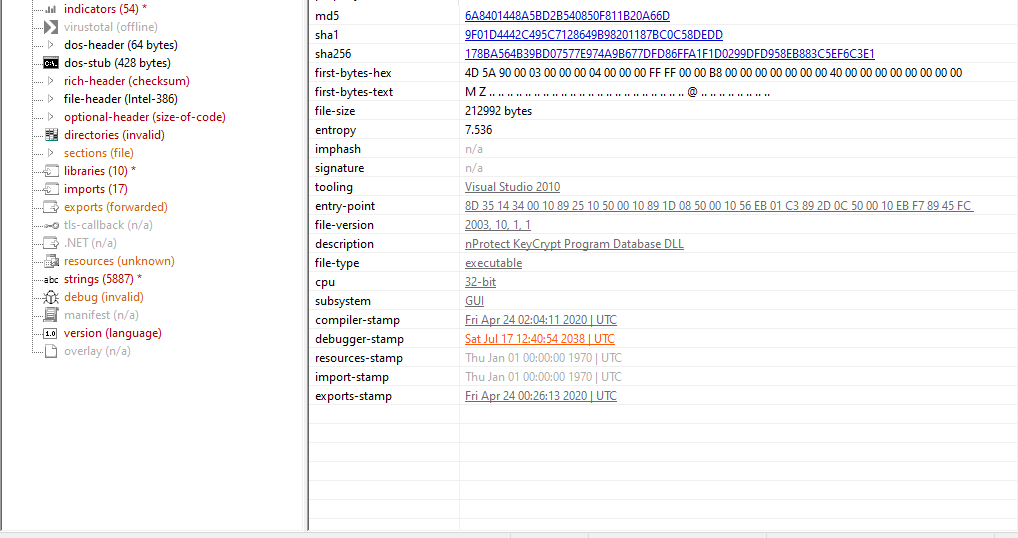
These are great tools to get familiar with! They consolidate a lot of information such as header information, imports, hashes, strings, and more. Some common ones are PE-Bear, PE view, and PEstudio. They all function the same way for the most part with some minor differences. PE view is very basic, PE studio is somewhat the newer improved version with imports and strings being flagged(not always accurate, but still good), and PE Bear I use primarily for my own preference and unmapping memory from malware whenever I’m done unpacking. When using these tools, you’ll want to focus on capturing general information such as it’s hashes, entropy, IAT (Import address table), Virtual size and Raw size of data. These will assist in finding if the malware is packed or what behavior this malware may have.
PE Studio
PE-bear
PEview
CFF Explorer/Detect It Easy
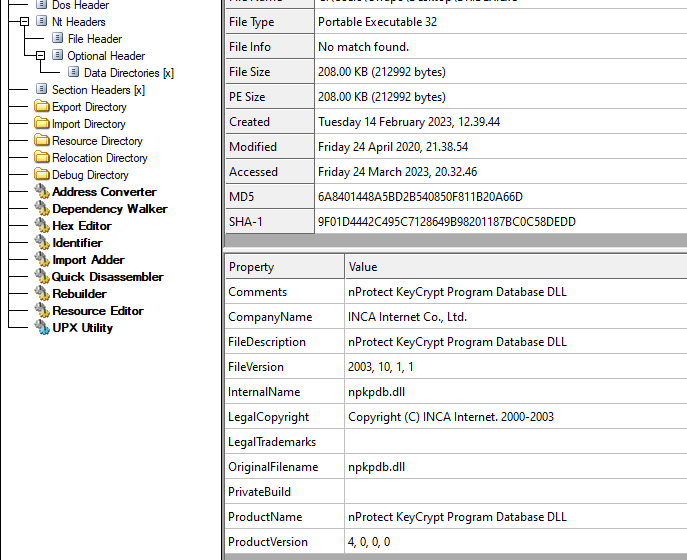
Similar to the PE analysis tools, CFF Explorer and Detect It Easy display similar general information. With these two though, you have a hex editor attached for realigning memory addresses. I prefer to use another Hex editor known as HxD, but these do give you the options. CFF Explorer also contains Dependency Walker, the predecessor of Process Explorer a task manager like tool. Detect It Easy scans the file and displays the entropy, hashes, strings, and hex editor in different formats via individual tabs rather than consolidated on a single page. Practically the same information just segregated though.
Detect It Easy

CFF Explorer
Packed Malware? What is it?
There’s a constant fight between malware authors and malware analysts between who knows the most about each other. Malware authors use many tactics in an attempt to prevent analysts from understanding their code. Packing the malware is one of those tactics employed across practically every large malware family. Packed malware essentially is when the malware is encapsulated by a layer of encryption. This limits static analysis greatly since much of this code is obfuscated or not even displayed tools like PEstudio. Many times your IAT will go from a list of 50 functions down to 5 (just as an example, but you get the point). Many of your strings will be pure obfuscated shell code and many of your basic static analysis techniques will be useless unless you unpack malware or perform advance dynamic analysis. Here are some tips to look out for in packed malware:
- Entropy level. The amount of random strings occurring in the file. Located usually where the general information is on analysis tools, this level goes up to 8. Anything around 6-8 is a good indicator that it’s packed.
- Raw Size vs. Virtual Size: These sizes are supposed to be pretty close to the same number. This is located in the Image File Header .text section. If the virtual size is much larger than the raw size, this is another indicator that this malware is packed.
- Very few imports on IAT: As mentioned, your IAT shows what DLLs and associated functions that file is using to carry out its actions. If you’re seeing an abnormally small amount of functions and DLLs, chances are your malware is packed.
Note Taking
Always document your findings throughout your process. I usually take a bunch of screenshots, side notes and even videos when analyzing. Then, I’ll compile what I think is most valuable for my report and start writing. Note taking is paramount, especially during this stage in learning malware analysis. Using a word doc or your favorite note taking app should suffice. I’ve even seen many reports use Visual Studio to annotate lines of code as well for things such as YARA Rules.
Basic triaging steps: General steps
- Check network connections
- Open up terminal Floss “file name” > “what you want to name file”
- Analyze strings, sort through the gibberish and look for any keywords like functions, file paths, names, or any human readable words.
- Open up PE-studio(Or PE-bear/PEview), annotate hashes, entropy, and of course if you see the magic bytes “MZ”, keep rolling on.
- View IAT and annotate DLLs and functions. These functions aren’t necessarily malicious in nature but can be depending on their usage.
- Based on your analysis thus far, you feel that you’re ready to start dynamic analysis now.
Summary
We’ve discussed safe handling practices for malware and how these can prevent us from infecting our host OS and network. We’ve also talked about how to use tools such as Detect It Easy, PEstudio and Floss that we can use for analysis just to name a few. During analysis its critical to take notes as much as possible so we can provide a well detailed report in the end. Finally, I breezed over some basic steps for analysis to help give you a guide through your studies. This is meant as a foundations course to line up with the advance static analysis and dynamic courses.
Like what you learned? Follow me!
Linkedin: https://www.linkedin.com/in/frank-galambos-ba720377/
Twitter: https://twitter.com/frankiegalambos